How to unblur a photo: 5 methods that actually work
Blurry wedding photo? Out-of-focus group shot? Pixelated old scan? Here are the five best ways to unblur a photo in 2026 — ranked by speed, cost, and how well they actually work on faces, text, and family prints.
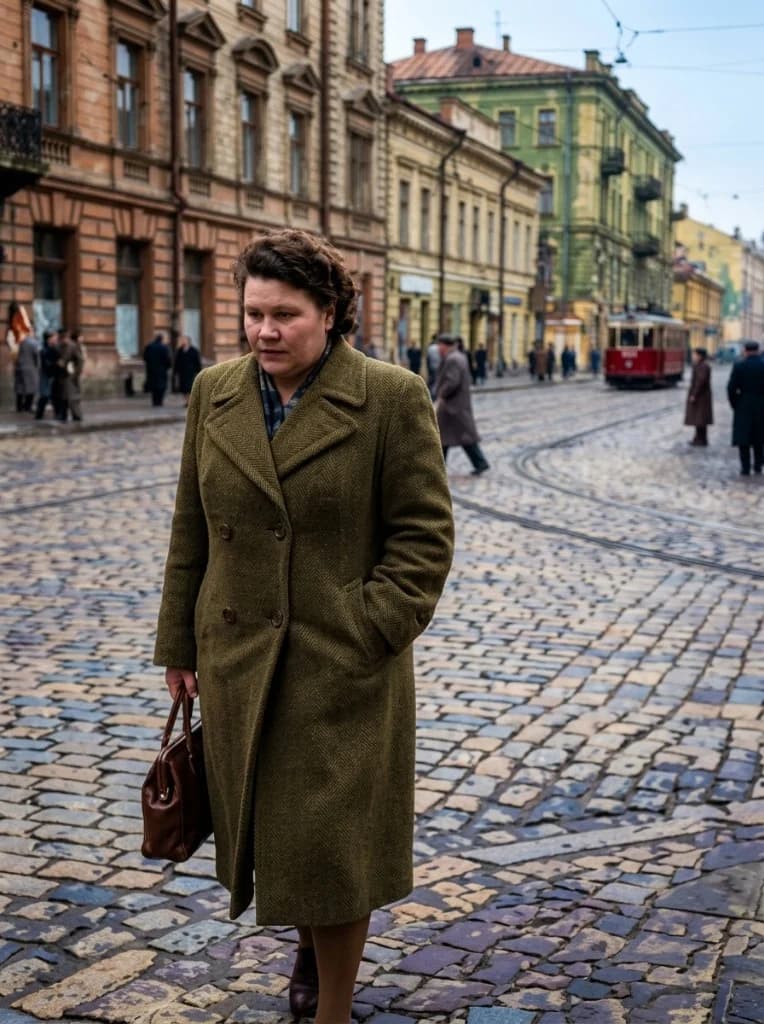
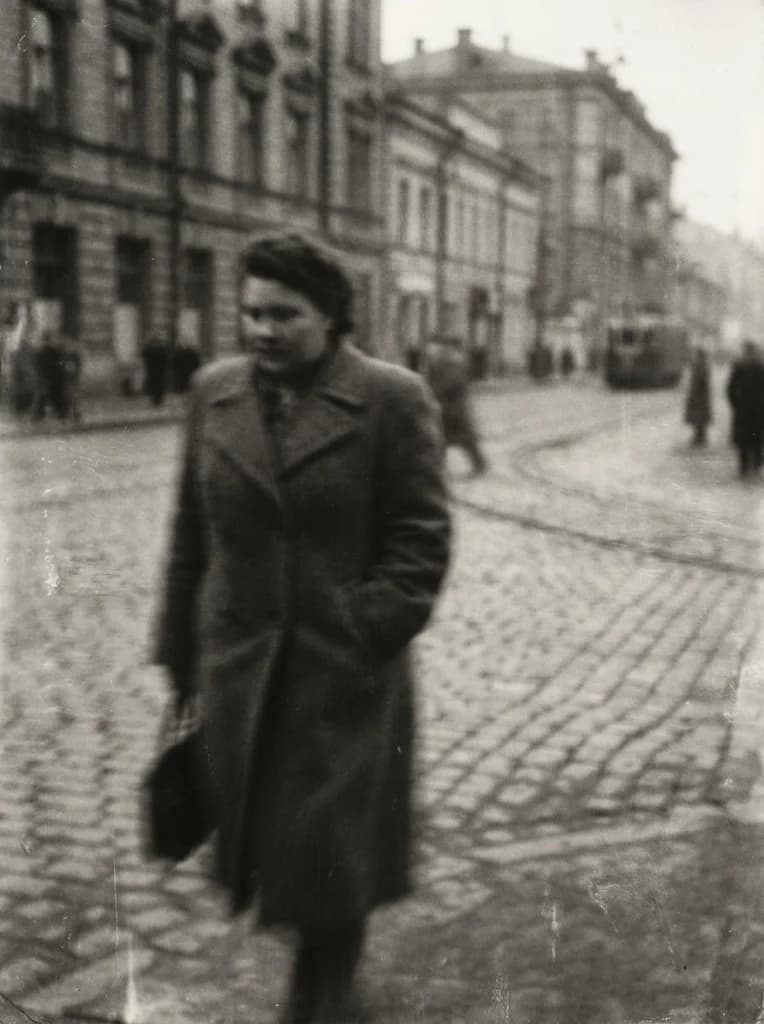
Drag the slider — real before/after from a DuneLens Revive unblur.
Why photos turn out blurry
Before you unblur a photo, it helps to know what caused the blur — the right tool depends on it:
- Motion blur — camera shake or subject movement during exposure. Common on phone photos of kids, pets, and low-light scenes.
- Focus blur — the camera focused on the wrong spot. Backgrounds are sharp, subject is soft.
- Compression blur — caused by repeated WhatsApp/SMS/email compression. Edges look "mushy" and colors posterized.
- Resolution blur — small or upscaled photos lose detail. Pixels visible on zoom.
- Age & damage blur — scanned prints, faded photos, or water-damaged albums.
The good news: modern AI photo enhancers handle all five types in a single click, which is why we rank AI as the #1 method in 2026.
AI photo enhancer (our pick)
Our pickStep by step
- 1.Upload your blurry photo to an AI enhancer (we recommend DuneLens Revive).
- 2.Choose 'Unblur + Upscale' — the AI reconstructs missing detail using a deep-learning model trained on millions of sharp photos.
- 3.Download your HD result in about 2 minutes.
Pros
- Works on any type of blur (motion, focus, compression, low-light)
- Recovers facial detail, skin texture, and even readable text
- No technical skill required
- Upscales resolution up to 4× at the same time
Cons
- Most quality AI tools aren't 100% free — DuneLens starts at $29 for 10 photos
- Extreme blur may not fully recover
Try it free with DuneLens Revive
Upload any blurry photo, see the AI unblur preview free, and only pay ($29 for 10 photos) if you love the result. Full HD output, face recovery, and 4× upscale in one click.
Adobe Photoshop (Shake Reduction + Super Resolution)
Step by step
- 1.Open your photo in Photoshop.
- 2.Go to Filter → Sharpen → Shake Reduction. Photoshop auto-detects motion blur and attempts to reverse it.
- 3.For focus blur, use Filter → Neural Filters → Photo Restoration (requires Creative Cloud).
- 4.For resolution loss, use Image → Image Size → Preserve Details 2.0 or Camera Raw's Super Resolution.
- 5.Fine-tune with masking and selective sharpening to avoid over-sharpening backgrounds.
Pros
- Precise manual control over every pixel
- Works offline
- Industry-standard for professionals
Cons
- Steep learning curve
- Expensive subscription ($22.99/month)
- Shake Reduction only works on clean motion blur
- Neural Filters require a reasonably recent GPU
Adobe Lightroom Enhance
Step by step
- 1.Import your photo (RAW works best).
- 2.Right-click the photo → Enhance → Super Resolution + Denoise.
- 3.Use the Texture, Clarity, and Sharpening sliders in the Detail panel to crisp up edges.
- 4.Export at full resolution.
Pros
- Great for RAW files straight from a camera
- Non-destructive editing
- Excellent for noise reduction in low-light shots
Cons
- Weak on heavy blur — it's a sharpener, not a rebuilder
- Doesn't reconstruct missing detail like AI tools do
- Monthly subscription
Free online unblur tools
Step by step
- 1.Upload your photo to a free web tool (many are browser-based).
- 2.Select the 'unblur' or 'sharpen' option.
- 3.Wait for processing, then download.
Pros
- Free with no installation
- Good for quick, casual fixes
Cons
- Heavily watermarked outputs on most services
- Strict resolution and file-count limits
- Privacy concerns — your photos may be stored or used for model training
- Results are visibly worse than paid AI tools
Mobile apps (iPhone & Android)
Step by step
- 1.Install an AI photo enhancer app (look for one with a clear privacy policy).
- 2.Grant camera roll access and select your blurry photo.
- 3.Tap 'Enhance' or 'Unblur' and wait for the AI to process.
- 4.Save the enhanced version back to your camera roll.
Pros
- Convenient for phone photos
- Fast for social-ready content
Cons
- Lower resolution output than desktop tools
- Many apps aggressively upsell a subscription
- Limited control over the enhancement
Side-by-side comparison
Here's how the five methods compare on the metrics that matter:
Pro tips & common mistakes
Start with the highest-res copy you have
If the photo has been compressed, texted, or screenshotted multiple times, find the original. AI reconstructs lost detail, but more source data = better results.
Don't over-sharpen
Heavy-handed sharpening creates crunchy halos around edges. If you're using Photoshop or Lightroom, a light touch beats a heavy one. AI enhancers handle this automatically.
Unblur faces separately from backgrounds
Photoshop masking lets you enhance faces aggressively while keeping backgrounds soft and natural. AI enhancers like DuneLens apply face-aware reconstruction automatically.
For old or damaged photos, use a restoration tool (not just unblur)
Restoration tools handle scratches, fading, and color loss in addition to blur. DuneLens Revive does all of these in one pass.
Always keep the original
Never overwrite the original file. Save enhanced copies with clear filenames so you can try different methods and compare results.
Bottom line
If you just want a blurry photo fixed — fast, cheap, and without learning Photoshop — an AI photo enhancer is the clear winner in 2026. DuneLens Revive unblurs, upscales, and restores in about 2 minutes, from $29 for 10 photos, with a full money-back guarantee if you're not amazed.
For professionals who need pixel-level control, Photoshop and Lightroom remain worth the subscription. For casual one-offs, free online tools can do the job in a pinch — just expect watermarks and privacy trade-offs.
How to unblur a photo: FAQ
Yes — with the right tool. Modern AI models reconstruct missing detail by predicting what a sharp version of your photo should look like, based on training on millions of sharp images. For mild-to-moderate blur, the result is often indistinguishable from an originally-sharp photo. For extreme blur, results improve dramatically but may not fully recover.
For ease, quality, and speed, AI-based enhancers are the best option. DuneLens Revive ranks highest in our testing for face recovery, 4× upscaling, and handling both motion blur and focus blur in one pass. It processes a photo in about 2 minutes from $29 for a 10-pack.
Free online sharpening tools can help with mild blur, but output quality is limited and often watermarked. DuneLens offers a free preview of the enhancement before you pay. For serious unblurring (faces, text, old photos), a paid AI tool gives dramatically better results.
Yes. You can upload the photo to a web-based AI enhancer in your phone's browser (no app install required) or use a dedicated iOS/Android app. For highest quality, we recommend uploading to a desktop-grade AI enhancer even from mobile — you'll get a better final result.
Yes — AI photo restoration tools are specifically trained on historical photos. They can sharpen blurry B&W photos, recover facial detail, and optionally colorize them. This is one of the most popular use cases for DuneLens Revive.
It depends on the tool. Look for: (1) end-to-end encryption, (2) auto-deletion policy within 7–30 days, (3) no training on user uploads, and (4) clear commercial-use rights. DuneLens meets all four.
Ready to unblur your photo?
Upload, preview for free, and only pay if the result wows you. Most photos process in under 2 minutes.